Mastering Your Manicure: Selecting the Perfect Professional Nail Art Brushes
Elevating your manicure game requires more than just quality nail products; it hinges on the tools you use. At LashMer.com, we understand the importance of precision and creativity in nail art. From intricately placed rhinestones to flawless metallic finishes, the right professional nail art brushes can make all the difference in achieving your desired look. As we delve into the world of nail art brushes, you’ll discover the various types, materials, and sizes that can help you express your artistic vision. Whether you’re a professional technician or a DIY enthusiast, there’s a perfect brush waiting for you. Keep reading to unlock the secrets of selecting and mastering these essential tools!
Key Takeaways
- selecting the right nail art brushes is crucial for achieving desired designs
- understanding brush materials enhances precision and overall nail art quality
- proper maintenance extends the life and performance of nail art brushes
- mastering basic techniques builds a strong foundation for advanced nail art skills
- experimenting with brush pressure and angles can yield more dynamic nail designs
Understanding the Types of Professional Nail Art Brushes

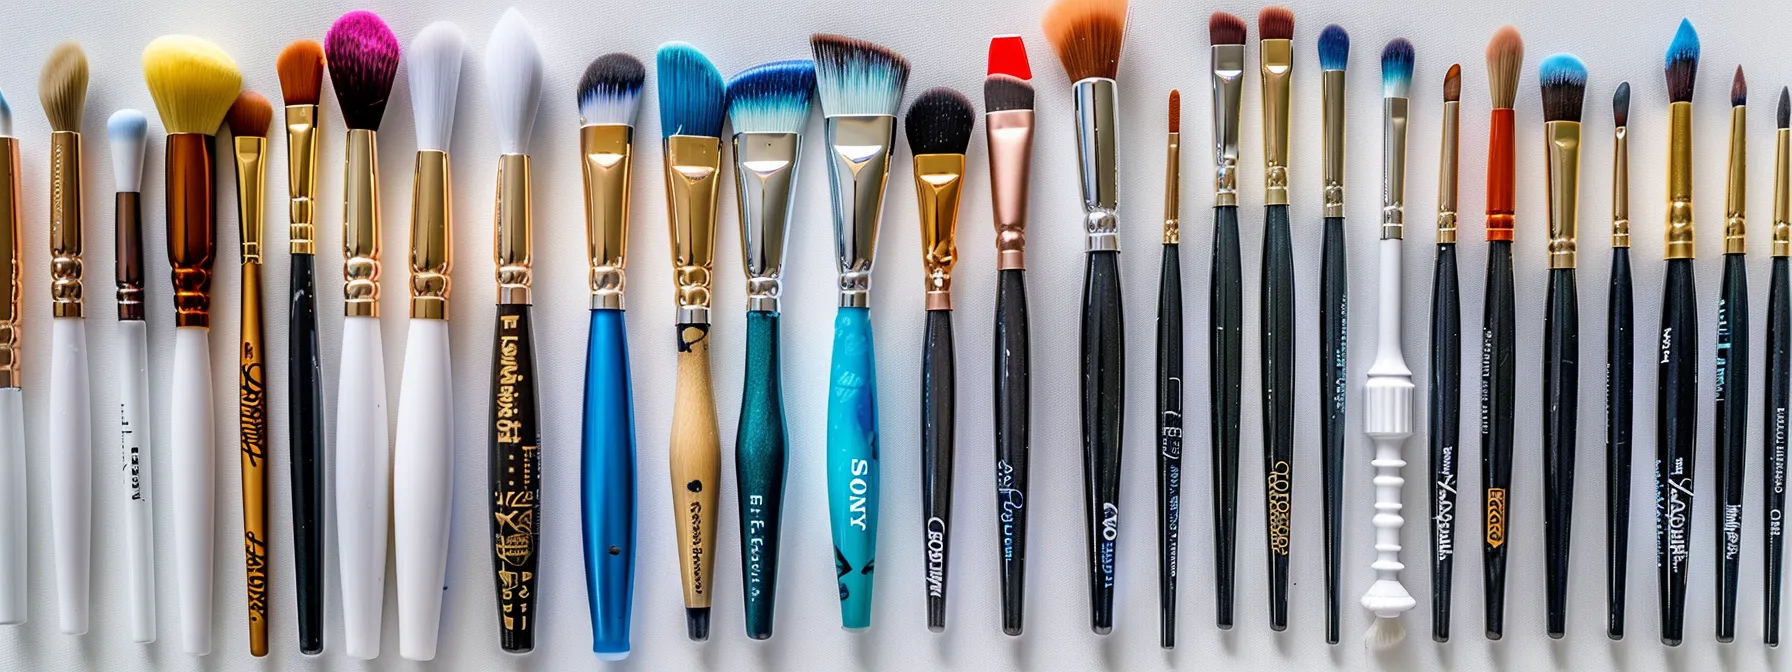
When it comes to achieving the perfect manicure, selecting the right tools significantly affects the outcome. I’ve found that understanding your specific needs enables you to choose the ideal brushes that align with your artistic vision. Whether you’re working with gel, experimenting with silicone brushes, or diving into intricate designs, each brush type serves a distinct purpose LashMer.com=””>LashMer.com/iu_categories/nail-products/”>nail products. From detailed detailers for fine lines to stripers for bold strokes, knowing the various options is vital. Additionally, considering the specific styles and techniques you want to create will guide you in building a cart filled with the most appropriate brushes. Let’s examine these brush types more closely and determine how to select them based on your desired nail art designs.
Identifying Your Manicure Needs
To truly master your manicure, it’s essential to identify your specific needs before purchasing any nail products brushes from LashMer.com. Each technique I use, whether it’s applying powder, creating detailed designs with a pen brush, or cleaning up edges with acetone, requires a different tool. Evaluating the styles you plan to incorporate will guide you in selecting brushes that suit those techniques, ensuring you make the most of your investment at a favorable sale price:
- Determine the nail art styles you want to create.
- Assess the techniques you’ll use, such as drawing or blending.
- Consider the types of products you’ll be working with, like powder or gel.
- Evaluate your budget and look for brushes that fit within your sale price range.
Overview of Brush Types: From Detailers to Stripers
In my journey through the world of nail art, I’ve discovered an array of professional nail art brushes that each play a critical role in achieving stunning designs. For instance, detailer brushes, with their fine bristles, are perfect for adding intricate line work, while stripers excel at creating bold, sweeping strokes that can elevate any manicure. When selecting brushes, I always consider the brand for quality assurance, ensuring my nail products polish application remains flawless and consistent.
Selecting Brushes Based on Nail Art Designs
When it comes to selecting brushes for specific nail art designs, I always align my choices with the creativity and detail required for each project. For example, when I’m planning to create delicate floral patterns, a fine-tipped detailer brush becomes my go-to nail products, as it allows for precision that larger brushes simply can’t match. On the other hand, if I’m going for a bold geometric design, I often reach for a striping brush to effortlessly create those sharp lines that make the artwork stand out.
Now that we’ve explored the various types of professional nail art brushes and their unique applications, it’s time to uncover the materials nail products that can elevate your nail art game. Understanding these materials will empower you to choose the perfect brush for stunning, long-lasting designs.
The Essential Guide to Nail Art Brush Materials

Understanding the materials used in nail art brushes, as well as nail products, is essential for any nail artist aiming for excellence. I’ve often found myself comparing natural and synthetic bristles, as each type offers distinct advantages for various art styles. Natural bristles tend to provide a softer touch and absorb product effectively, making them ideal for techniques like blending or creating soft gradients. Conversely, synthetic bristles excel at precision and maintaining their shape, which proves beneficial for tasks requiring sharp lines or detailed work. In addition to selecting the right material, I’ve learned that proper maintenance techniques, such as cleaning after each use and storing them correctly, can significantly extend the life of my brushes. By recognizing the strengths of each bristle type and committing to adequate care, I can ensure my tools support my creative pursuits effectively.
Comparing Natural Versus Synthetic Bristles
In my experience, the choice between natural and synthetic bristles from LashMer.com can profoundly influence my nail art results. Natural bristles, with their soft flexibility, work beautifully for techniques that require blending and softness, while synthetic bristles deliver the precision needed for clean lines and intricate designs. This distinction often guides my selection process based on the specific challenge or style I’m tackling in a manicure project. nail products
Benefits of Each Material for Specific Art Styles
When I’m working on intricate nail art, the choice of brush material can make all the difference in the outcome of my designs. For soft, blended effects, natural bristles provide that gentle touch I need, allowing the polish to flow seamlessly and create beautiful gradients. Conversely, for precise line work and detailed patterns, synthetic brushes are my top pick since they retain their shape effectively and deliver the sharpness required for cleaner designs.
Maintenance Tips to Prolong Brush Life
Proper maintenance of nail art brushes is crucial to ensure their longevity and performance. After each use, I make it a practice to clean my brushes thoroughly with a gentle soap or brush cleaner, ensuring that no residue is left behind. This habit not only keeps the bristles in optimal condition but also prevents cross-contamination of colors in future projects.
Storing brushes correctly is just as important as cleaning them. I always keep my brushes in a dedicated holder with the bristles facing up, which helps maintain their shape and prevents any damage. By following these simple maintenance tips, I can prolong the life of my brushes and keep them performing at their best:
Armed with knowledge about nail art brush materials, you’re ready to take your creations to the next level. Let’s uncover the secrets of selecting the perfect size and shape tailored to your unique projects!
How to Select the Right Size and Shape for Your Projects

Understanding the right brush size and shape is pivotal when elevating your nail art skills. I’ve learned that matching specific brush sizes to the precision needed for various designs can make all the difference. For intricate details, a slender brush allows me to navigate tight curves and fine lines effortlessly, while broader brushes come in handy for filling larger areas with color or creating sweeping effects. Experimenting with different brush shapes has also taught me how to achieve unique results; for instance, a flat brush can create sharp edges, while a round brush can help in achieving softer, blended looks. For those just starting out, I recommend investing in versatile brushes that can handle multiple techniques, simplifying the creative process and allowing you to explore your artistic side without feeling overwhelmed.
Matching Brush Sizes With Nail Art Precision
Choosing the correct brush size is vital to achieving precision in my nail art creations. I often find that smaller brushes are ideal for intricate designs, allowing me to maneuver easily around curves and tiny details without compromising the overall look. Conversely, when I’m aiming for wider strokes or filling larger areas, I reach for larger brushes that enable me to work quickly and efficiently, blending colors seamlessly and creating bold statements.
Shapes That Make Detailing and Effects Easier
In my experience, the shape of a brush plays a significant role in achieving specific detailing and effects. For instance, a flat brush is my go-to for creating sharp, defined lines, while a round brush allows for more fluid, blended transitions in color. By understanding how each shape interacts with the polish, I can effectively manipulate my designs to reflect the artistic vision I have in mind.
Expert Tips on Versatile Brushes for Beginners
As a beginner, I recommend starting with a set of versatile brushes that can adapt to various techniques. A combination of round, flat, and detailer brushes allows me to approach different designs without feeling limited. This way, I can experiment freely, gaining confidence in my skills while discovering which styles I enjoy the most.
It’s also helpful to choose brushes that are easy to handle and maintain. I’ve found that brushes with comfortable grips not only make the application process smoother but also enhance my accuracy. Investing time in understanding how these tools work will set a strong foundation for my nail art journey.
Understanding the right size and shape for your projects sets the foundation for success. Let’s shift our focus to another essential aspect of beauty: investing in quality brushes that can elevate your application game.
Investing in Quality: What Makes a Professional Brush

Recognizing the essence of quality in nail art brushes can reshape the way I approach my craft. High-quality brushes exhibit key features like durable bristles, ergonomic handles, and precise shapes, all of which significantly enhance my application process. Over the years, I have come to rely on specific brands known for their reliable performance and innovative designs, which I’ll share along with tips on where to find them. I’ve also learned the importance of weighing price against quality; investing in professional-grade tools may seem like a higher upfront cost, but they ultimately ensure better results and longevity, leading to a more sustainable addition to my nail art repertoire.
Key Features of High-Quality Nail Art Brushes
When I look for high-quality nail art brushes, there are several features I prioritize to ensure I achieve the best results. Durable bristles are crucial as they maintain their shape and performance, even after repeated use. An ergonomic handle not only provides comfort during long application sessions but also enhances my control over intricate designs.
In addition, the precision of the brush shape matters immensely; I seek brushes designed specifically for the techniques I aim to execute. These elements combined create a reliable tool that stands the test of time and delivers excellent outcomes for my nail art projects:
Brand Recommendations and Where to Find Them
When searching for high-quality nail art brushes, I often rely on reputable brands known for their craftsmanship and reliability. Brands like OPI, CND, and Young Nails consistently deliver exceptional tools that enhance my nail art experience. I usually check their official websites or trusted beauty supply retailers to find the latest collections and promotions that align with my needs.
In addition to exploring established brands, I’ve also found value in local beauty supply stores where I can physically assess the brushes. This hands-on approach allows me to gauge the weight, feel, and overall quality before making a purchase. I appreciate brands that prioritize customer feedback, as it helps me make informed decisions for my nail art toolkit.
Deciphering Price Versus Quality for Long-Term Investment
In my experience, the decision between price and quality is vital for anyone serious about their nail art journey. While it can be tempting to opt for cheaper brushes, I’ve learned that investing in quality products pays off in the long run. A well-made brush not only enhances my application process but also withstands the test of time, making it a wise choice for consistent results.
Here are some vital considerations I keep in mind when evaluating the price versus quality:
- Durability: High-quality brushes last longer and maintain their shape.
- Performance: Premium brushes offer better precision and control during application.
- Overall Value: Investing more upfront often leads to fewer replacements and ultimately saves money.
Having discovered the key features that define a top-notch professional brush, it’s time to turn our attention to ensuring those brushes stay in prime condition. By incorporating proper care and maintenance techniques, you can extend the lifespan of your nail art tools and achieve flawless results every time.
Proper Care and Maintenance of Your Nail Art Brushes

Taking good care of my nail art brushes is paramount to achieving consistently excellent results. I always prioritize a step-by-step approach to cleaning my brushes after each use, ensuring that any residue is thoroughly removed to prevent damage and maintain performance. Proper storage is equally important; I’ve found that keeping my brushes in a way that upholds their shape contributes significantly to their longevity. Additionally, I regularly assess the condition of my brushes to determine when it’s time for a replacement, as worn-out brushes can undermine the quality of my work. By implementing these practices, I can ensure that my tools are always in top shape, ready for my next creative endeavor.
Step-by-Step Guide to Cleaning Brushes Post-Use
After each nail art session, I make it a priority to clean my brushes meticulously to ensure they remain in optimal condition. I start by rinsing the bristles under lukewarm water, gently working out any product residue without bending or distorting their shape. Following the rinse, I apply a mild cleanser and use my fingers to carefully lather the bristles, ensuring I remove all pigments, which allows the brushes to maintain their performance and extends their lifespan.
Once cleaned, I rinse the brushes thoroughly until the water runs clear, making sure no soap or product is left behind. After patting them dry with a clean towel, I reshape the bristles to their original form and lay them flat on the towel to dry completely. By following this process routinely, I can preserve the quality of my brushes and ensure they are ready for my next creative project.
Storing Your Brushes to Maintain Shape and Quality
Properly storing my nail art brushes is one of the key factors in preserving their shape and quality. I make it a point to use brush holders that support the bristles, ensuring they remain upright and free from any bending or crushing. By paying close attention to this detail, I can avoid compromising their performance and longevity.
Incorporating a consistent storage routine to my practice plays a significant role in my brush maintenance strategy, as it prevents wear over time:
- Always place brushes in a holder with bristles facing up.
- Avoid stacking brushes to prevent bristle distortion.
- Store in a cool, dry area away from direct sunlight.
When to Replace Your Brushes for Optimal Performance
Recognizing when to replace my nail art brushes is crucial for maintaining quality in my work. I regularly inspect the bristles for signs of fraying, loss of shape, or excessive wear, and I don’t hesitate to replace them if I notice any decline in performance. By keeping my tools in top condition, I can ensure that they consistently deliver the precision and detail I strive for in every manicure.
With your nail art brushes well taken care of, it’s time to elevate your skills. Get ready to master techniques that will showcase your creativity like never before!
Mastering Techniques With Your Professional Brushes

Mastering the use of professional brushes not only enhances my skills but opens the door to a world of creative possibilities. I begin with the fundamental strokes and techniques, which serve as the foundation for my artistry. From there, I dive into advanced designs, exploring intricate patterns that challenge my skills and creativity. To further refine my abilities, I integrate practice exercises that focus on both precision and expression, enabling me to push the boundaries of my nail art. This journey not only boosts my confidence but also transforms each manicure into a true work of art.
Basic Strokes and Techniques for Beginners
As I began my journey into nail art, mastering the basic strokes was essential for building a solid foundation. I focused on familiarizing myself with techniques like the straight line, dot placement, and even simple curves, which are the building blocks of more intricate designs. Each practice session brought me closer to achieving fluidity and confidence in my application.
Once I established my comfort with the basics, I realized that experimenting with brush angles and pressure led to remarkable results. Small adjustments could transform a simple stroke into a more dynamic line or a stunning swirl. Understanding how these fundamental techniques interact with nail polish helped me create an array of designs, making my artistic expression even more fulfilling:
Advanced Designs and How to Achieve Them
As I delve into advanced nail art designs, I find that mastering techniques like negative space, marbling, and intricate layering brings my creations to life. For negative space designs, I strategically plan the areas I want to leave bare, using fine brushes to create bold lines that define the shapes. When experimenting with marbling, I skillfully blend contrasting colors on the nail, utilizing a gentle touch and quick motions to achieve a seamless effect that captures the eye.
Practice Exercises to Improve Precision and Creativity
To enhance my precision and creativity, I often set aside dedicated practice sessions focused solely on experimenting with different brush techniques. I challenge myself to create various patterns, from delicate lacework to bold abstract shapes, which not only hones my skills but also sparks innovative ideas for future designs. By pushing the boundaries of what I can achieve with each brush, I continually discover new ways to express my artistic vision and refine the finesse in my nail art creations.


